Here are the instructions to fit Ultimate Styling performance rear lights to your Ford Fiesta Mk7. Before you start you will need a Torx Tx30 screwdriver or large flathead screwdriver and a Philips screwdriver.
Follow these instructions to fit the part yourself. However, Ultimate Styling can’t be held responsible for any damage during fitment.

Overview:
- Remove the parcel shelf
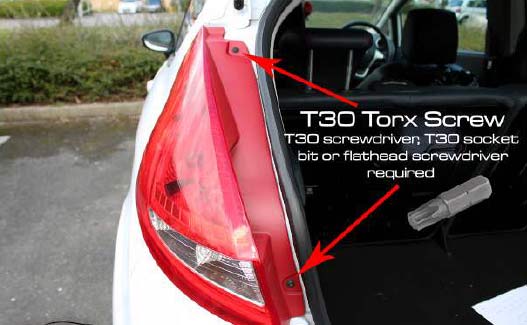
- Remove the two Torx screws with the Torx / flathead screwdriver
- The light unit will feel loose, but there is still a wingnut to remove
- Undo the screw that holds on the boot trim
- Lift the trim and fold the side carpet back
- Now you can get your hand inside the bodywork. Here you will find the wingnut
- Loosen the wingnut with your fingers, then pull the light unit away from the body
- To remove the electrical connector, squeeze the clips and pull it towards you
- Time to put the new light in
- First, reattach the electrical connector
- Align the light unit with the body
- Gently push the whole unit in
- Reach inside the bodywork and attach the wingnut to it’s original position
- Put the two Torx screws back in
- Gently push the side carpet back into place and screw the plastic trim back into place
- Make sure all the seals around the boot are back in place
- Replace the parcel shelf
Video Guide:
Full Guide:
-
 1: Remove the parcel shelf
2: Remove the two Torx screws with the Torx / flathead screwdriver
3: The light unit will feel loose, but there is still a wingnut to remove -
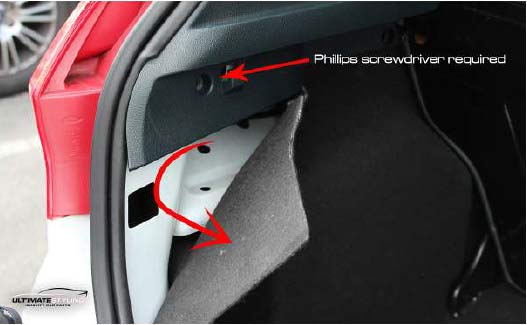 4: Undo the screw that holds on the boot trim
5: Lift the trim and fold the side carpet back
6: Now you can get your hand inside the bodywork. Here you will find the wingnut
-
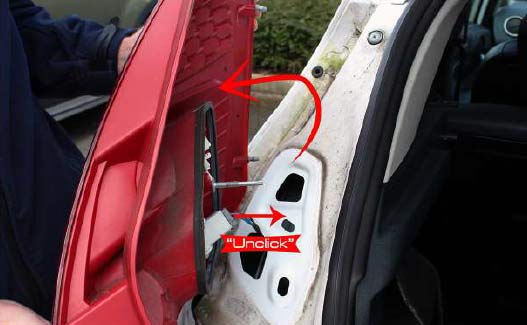 7: Loosen the wingnut with your fingers, then pull the light unit away from the body
8: To remove the electrical connector, squeeze the clips and pull it towards you
9: Time to put the new light in -
 10: First, reattach the electrical connector
11: Align the light unit with the body
12: Gently push the whole unit in
13: Reach inside the bodywork and attach the wingnut to its original position -
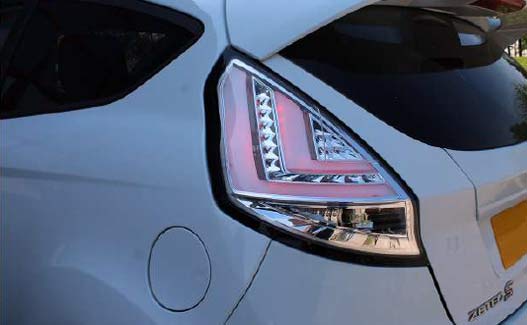 14: Put the two Torx screws back in
15: Gently push the side carpet back into place and screw the plastic trim back into place
16: Make sure all the seals around the boot are back in place
17: Replace the parcel shelf
Download PDF
View this part


